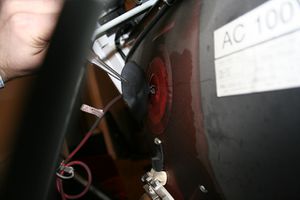
How to discharge a monitor
Discharging is the process of removing the stored charged inside a monitor to allow for working on the internals of the monitor. Arcade monitors can store charges of up to 30,000 volts, which is fatal to humans. Discharging is necessary when removing the chassis from the CRT or when swapping monitors and the chassis is not in a frame with the CRT. As the process may frighten some people, if you feel uncomfortable performing the discharge, please do so with the help of a qualified professional.
Alligator Clip Setup

The following is the Alligator clip setup. While it is the easiest to setup, it's potentially dangerous as the alligator clip can slip.
- Take a large flat blade screwdriver with a good plastic or rubber handle and and near the handle, attach one end of an alligator clip.
- Attach the other end *anywhere* on the metal monitor frame. I like to find a spare bolt hole, thread the bare wire through and wrap it round nice and tight so basically the driver is tied to the frame. By using the frame as a grounding point, the charge will dissipate across the front of the tube, acting like a big glass resistor.
Soldered Wire Setup
As Alligator Clips can slip, the Soldered Wire Setup is safer and recommended.
- Take a metre long piece of wire, strip both ends so that you have a good three inches of bare wire.
- Take a large flat blade screwdriver with a good plastic or rubber handle and and near the handle, sand back any anodised/chrome coating until you get to bare steel below. This is so that solder will stick.
- Wrap one bare end of the wire around the newly sanded bit on the driver, and douse the **** out of it with solder. You want to put lots of solder on so the connection doesn't move and you are sure you have metal to metal.
- Wrap the other end of the wire *anywhere* on the metal monitor frame. I like to find a spare bolt hole, thread the bare wire through and wrap it round nice and tight so basically the driver is tied to the frame. By using the frame as a grounding point, the charge will dissipate across the front of the tube, acting like a big glass resistor.
High Voltage Probe Setup

For those who find Alligator Clips on a screwdriver too dangerous and don't want to solder wire.
- Buy a high voltage probe.
- Hook the high voltage probe up to your non auto-ranging multimeter.
- Attach the black wire *anywhere* on the metal monitor frame. It should come with an alligator clip on the end of the black wire to make attaching it to the frame easy. By using the frame as a grounding point, the charge will dissipate across the front of the tube, acting like a big glass resistor.
Cowboy Setup
The Cowboy setup is for Cowboys only. Don't try this at home.
- Take two large flat blade screwdrivers. Cross the screwdrivers so that one is touching the metal monitor frame, and the other is in reach of the anode cap.
- Pray, write a will etc.
Removing the Anode Cap
- Ensure the cabinet is unplugged from the wall.

- With one hand in your back pocket, push the flat blade tip of the grounded screwdriver or tip of the high voltage probe under the anode cap until it reaches the clip in the centre.
- Wait 5 minutes.
- Perform Step 1 and 2 twice more. This will ensure that all of the electricity is discharged.
- Still with 1 hand in your back pocket, pinch the back of the anode cap. Push the cap to either the left or the right of the original position (to push one of the clips "in"), and then pull the cap towards you. The cap should come free.
- Finally, to be absolutely sure the cap is not holding any electrical charge, push the cap against the monitor frame a few times.
- Done!

Discharging is good practice and it never hurts to do so, but it should be noted that modern monitors (within last 15 years) tend to have an auto-discharge function so often you didn't need to bother really. If in doubt, discharge.
When you go to do the discharge, don't worry about wearing rubber gloves, but do remember to keep one hand in your pocket so that you have only the screwdriver hand in the back of the monitor - if you have both hands out and you *do* get a jolt, last thing you want is to grab onto something with your free hand and send the charge across your chest.