Cabinet Painting Guide
This guide is for painting plastics, but similar methods apply to painting metals.
Supplies
To paint a cabinet, we need:
- Red scotch pads (find these at motor factors/Halfords etc)
- Masking tape
- different grades of wet & dry sandpapers 240g, 600g, 800g and 1200g (find these at motor factors/Halfords etc)
- Primers
- Paint
The the lower the grit rating of sandpaper the more coarse the paper is, the higher the number the finer the paper is.
If you are painting plastics or metals you need the correct primer for the job. For plastic we need "Plastic Primer" You can also get Filler Primers and these are for surfaces that require a thicker coating of primer to cover imperfections etc. This is not required unless the surface we are primering is very scratched.
- Supplies
-
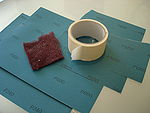 Sandpaper, Scotch Pads, Masking Tape
 -
 Plastic Primers
 -
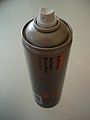 Spray Paint
 -
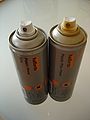
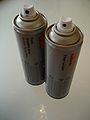 Metallic Spray Paint and Clear Coat


Moving onto the actual Paint, there are two style that require different painting methods.
Style 1 is normal paint. Any paint that has a non-metallic finish has a shiny gloss mixed in the paint. This makes it easier to paint as you only do the painting once to produce the shine.
Style 2 is metallic paint. These are the paints that have the twinkly little specs in them like you see on modern cars etc. This requires a base coat of the colour, and then a clear coat after.
Most of us will want our cabinets white so the extra clear coat wont apply. But for this guide, I am painting in a metalic colour to show whats needed to be done.
Preperation
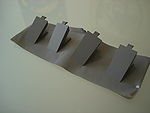
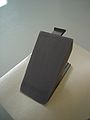
Now to start, we need the item to paint. for this guide, I am painting the monitor cover caps, but the steps are the same even if your painting the monitor surround or the control panel.
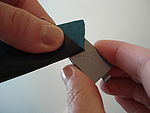
Take the red scotch pad and rub the area that you want to paint. We need to 'Key' the area for paint, as this gives the primer/paint something to stick too. If this is not performed or is not done adequately, the paint would flake off once it dries.
Gently rub the area with the scotch pad. The surface should become dull.
Once dull, blow any dust away from the parts your painting. The parts must be clean and clear of dust to properly paint them.
- Preparation
-
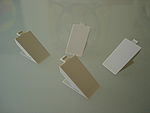 Monitor Cover Caps to Paint
 -
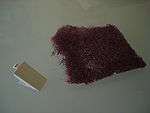 Keying the surface
 -
 The Surface becomes dull
 -
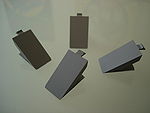
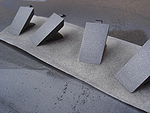
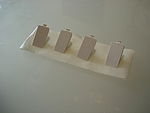 Masking tape is used to prevent the pieces moving around from the spray of the can


Priming
Make sure to clear the area you are painting in. Since we are using spray cans, paint/primer will be in the air and stick to any nearby surfaces. It is recommended to spray on cardboard in a clear area, like the garage or backyard.
Shake the can of primer up and spray a LIGHT coat onto the surface area. I can stress the word light enough! We want to BUILD up the layers of primer and paint. Rushing will cause the paint to run, and you'll need to start over from the beginning.
Allow 5 minutes between each coat of Primer. Make sure you spray about 10 inches away from the surface area, and dont spray in just one area. Simply dust the primer on. Do not rush.
Apply 3 coats of primer overall.
- Priming
-
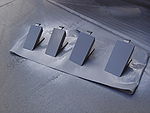
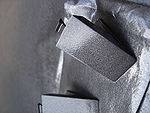
 Ready for Priming..
 -
 First Coat..
 -
 Second Coat..
 -
 Final Coat..
 -
 Primed!


Preparation for Paint
Give the primer approximately 3-5 hours to dry.
Once it's dry, we need to smooth the surface we have just primed. The surface should already be smooth, but will not be smooth enough for paint.
Take a sheet of 1200g wet & dry sandpaper and soak it in water. The water acts as a lubricant when doing fine prep.
Feel the primed surface with your fingers, and then rub the sandpaper against it a few times. Feel the surface again - it should be noticeably smoother. Be careful not to over rub as the primer will be removed. Make sure the paper is wet at all times.
- Paint Preparation
-
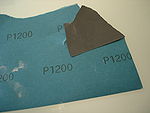 1200g sandpaper
 -
 Water!
 -
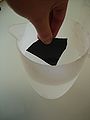 Soaking the Paper
 -
 Smoothing the Primer
 -
 Ready to go


Painting
Make sure the surface and surrounding area is DRY, CLEAN and DUST FREE. We want to carry the same steps as the priming from before, applying 3 nice lightly dusted coats. Build up the paint slowly!
- Painting
-
 First Coat..
 -
 Second Coat..
 -
 Final Coat!


If you're painting play white (Style 1), you are now finished. To make the cabinet really shine, T-Cut the coat.
If your painting metalics (Style 2), wait for the paint dry and then dust on 2 coats of clear coat. Let it dry and follow up with T Cut.