Lady Bug (Bootleg) Repair Logs
Repairer: Asayuki
Date: 29/Nov/2016
Symptom: Seller claims the board to be non-functional
There is not much to say about this repair. By just having a look at the board, there were a lot of parts that needed replacement. The board was also covered with crud, so I had to wash it. I hate doing this because it's always a risk, and doesn't do any good to all elctromechanical parts like dip switches, volume pots and similar.

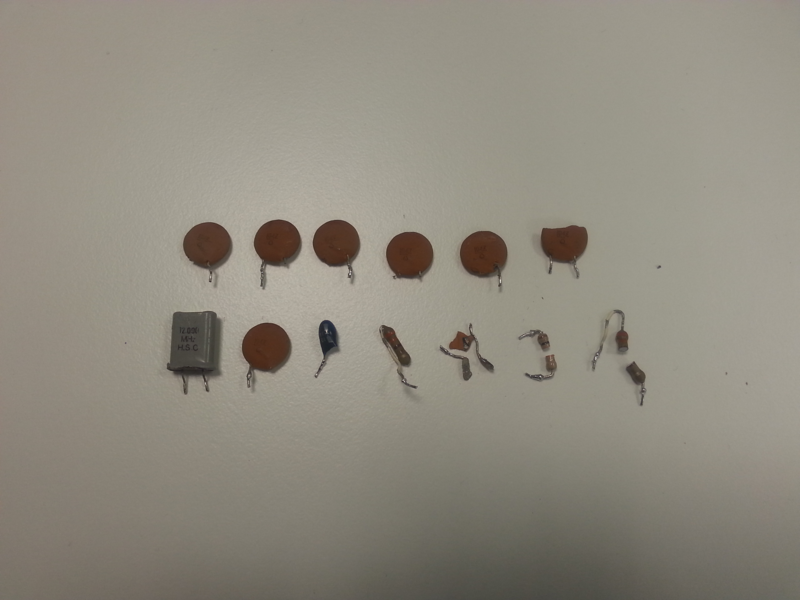
A very careful look at the entire board highlighted several capacitors which went broken or missing due to mistreatment and carelessness. A tantalum cap which was generating the delay for the RESET# pulse was also broken. No way this board would have started, in the conditions I received it, therefore I didn't even bother turning it on before having replaced all required parts. Also the quartz crystal caught my attention, because it had been soldered from the top side instead of from the bottom. Looking closer, the quartz was reading 12MHz, which is way above of what the processing units of the time could handle. A quick check on MAME confirmed that the board needed a 4MHz quartz crystal instead. Obviously some noob attempted to repair this board and failed. I had no 4MHz crystal on stock so I decided to borrow one from a Solomon's Key board I still have to look at, and buy a few while I was there. There was an area of the circuit, around the 556 double timer circuit, which had torn off components. Since timers were often used to generate sound back in the days when this board has been produced, I feared this was part of the audio generation and therefore I needed the exact values if I wanted to have faithful sound. Luckily the schematics of this board are available, and shown that the 556 was not part of the audio generation but rather served as monostable circuits to handle coin inputs. Being able to read the missing values from the schematic, I was able to populate the missing parts faithfully to the original. I hadn't applied power yet, and I already had a cemetery of components on my desk! :)

The board was now finally ready for powering up, therefore I quickly built the required adapter and switched it on. The board booted, passed RAM/ROM checks and went into a working attract mode but was plagued by these horizontal white and blue lines... Also, vibrations would make it crash. Meh :/

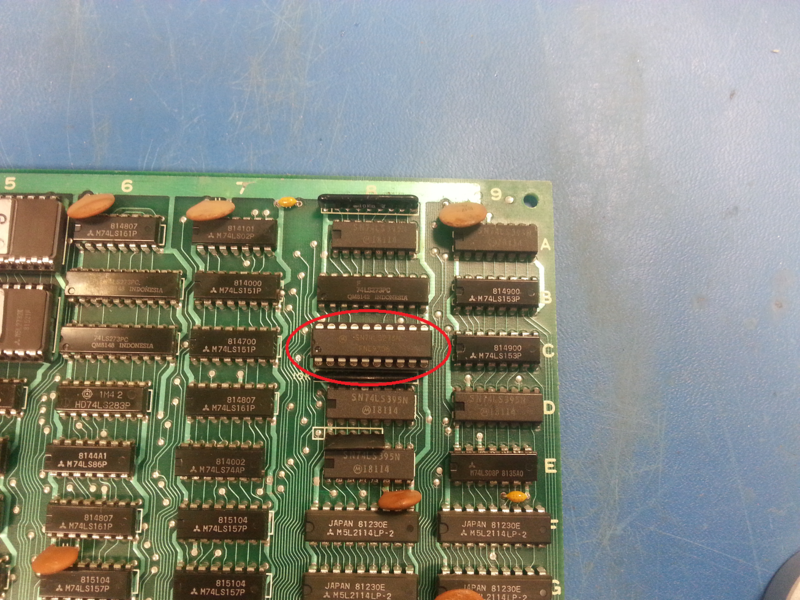
Luck came immediately to the rescue: by rebooting the board, a RAM error pointed me in the direction where to look: the socketed RAM had dirty pins. Not much of a problem: a bit of cleaning and reseating got rid of the RAM error. The graphics defect was changing with time, and letting the board warm up made the issue even worse while letting it cool down returned the issue to its original look. I took the freezer spray out of the closet and it didn't take long until I ended up freezing a 74LS273 that immediately reacted to the temperature change.

Bingo! By replacing it, I finally got a nice looking game.

I played some credits to test the sound and all controls for both players in cocktail mode and all controls and coin slots proved to be ok, as well as screen flipping. I however found out that the sound was coming and going. As expected after washing it, the volume pot was to blame; so I soldered a new one in and finally the sound was fixed and enjoyable. Repair complete! A very fun evening on a game that is always worth playing when you need some random relaxing entertainment.

