Sega Naomi Repair Logs
Repairer: channelmaniac
Symptom: Fails self test
Self test showed IC29 as bad. Replaced IC29 and re-ran the test.
IC29 was a standard 62256 surface mount type SRAM IC.
Symptom: Dead
System gave raster but no picture. Inspection of the board turned up a leaking .1f 5.5v memory capacitor. The electrolyte spread on the board and started corroding things.
Desoldered the BIOS ROM and the serial EEPROM holding the code for the Altera FPGA chip. Cleaned the electrolyte from the board and inspected the board for damage. The corrosion damaged a plate thru under the serial EEPROM socket, causing the FPGA chip to not load its code from the EEPROM upon boot. Repaired the trace, replaced the bad memory cap, and tested the board.
The EEPROM chip connects to the Altera chip as follows:
Pin 1 - Pin 12
Pin 2 - Pin 1
Pin 3 - Pin 37
Pin 4 - Pin 4
Pin 5 - Ground
Pin 6 - No Connection
Pin 7 - +5v
Pin 8 - +5v
Symptom: Broken USB jack and noisy fan
Replaced the noisy fan and USB jack.
USB jack was tough to find. Desoldered the jack and took it to an area "computer junk store." Found a Pentium II board in their scrap bin that had the same jack. Desoldered and installed it on the NAOMI system. Played a game of Marvel vs. Capcom 2 to test the system.
Symptom: Has audio but no video.
Traced the video output back to the RAMDAC chip. The RAMDAC was finger blistering hot. Replaced the RAMDAC (Sega # 315-6145) with one pulled from a parts NAOMI board.
Symptom: Intermittent controls
Replaced a broken USB jack on the I/O board. Checked and replaced a leaking memory backup capacitor.
Symptom: Error 01: This game is not acceptable by main board.
Connector CN1 had 4 bent pins. Replaced bad connector with one from a parts board and tested.
Repairer: Aryssor
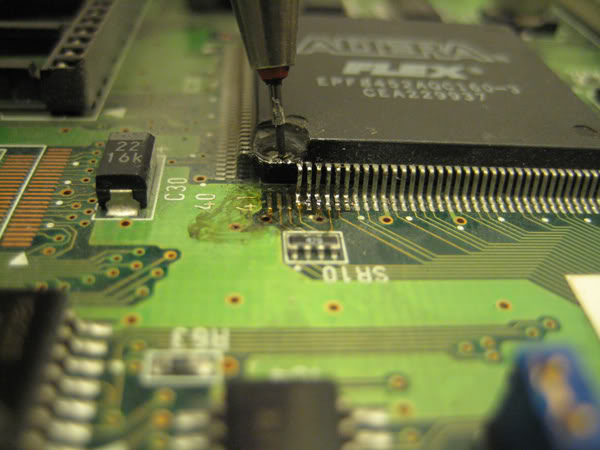
I obtained and Naomi mobo from eBay that arrived with some damage to one of the ICs. It was powering up, but showing only a black screen. Upon close inspection It looked like something had been dropped on it and had broken some of the pins.
Here's what I had to work with:
In order to repair this I opted to remove some of the IC cast and solder wire directly to the exposed traces. There are other ways of doing this such as conductive pen/epoxy bridge, however this is what I had to hand, without anymore outlay, and what I believe to be the most reliable connection.
I very carefully exposed the traces using a Dremel grinder bit, like these (on the left) mounted in a drill press for steadyness:
I didn't eat all the way to the traces using the drill, I got as close as I was comfortable with, then used a surgical scalpel to carefully scrape away the last little bit
Just to illustrate the scale...
That's a 0.5mm pencil lead!
A giant pound coin!
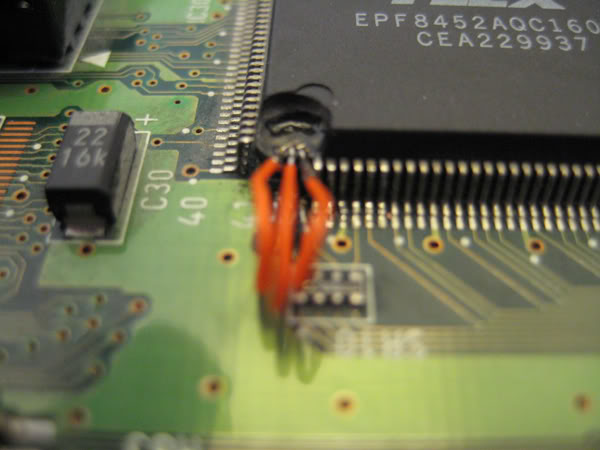
To bridge the exposed traces on such a small area, really the only option is Wire Wrap (commonly known as Kynar Wire).
This is basically a single thread of hairline-thin conductive insulated wire - find it on eBay by searching for 'Kynar'.
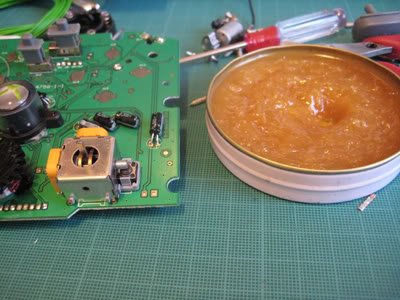
I first prepared the traces by brushing on some solder flux (it's important to buy non-acidic NOT the kind plumbers use).
Again, this is commonly available on eBay. I use an old model paintbrush to paint it on...
Dealing with such small component areas, I went for a U-shaped application, otherwise the wire gets hot very quickly and the insulation burns off, very difficult to work with.
First soldered to the PCB...
...then folded over with tweezers, one at a time and soldered to the exposed traces on the IC.
I finished the repair off by adding a nice blob of hot glue to protect it and make it permanent (sorry I have no pic of this! Just imagine a big blob of glue over the repaired area).
Fired it back up and hey presto!
Naomi Mugti (sic) System bios? Mmm nice...
And with a proper bios in...
There you have it. Hopefully this mini-guide is of use to those of you with similarly damaged PCBs and a steady hand.


